Contents
Imagine you’ve just returned from a hike, and you notice a tick embedded in your skin. It’s vital to handle the situation correctly to minimize health risks. Knowing the right tools and techniques can make a difference in safe removal. Understanding the risks and steps involved will prepare you for this uncomfortable encounter. Let’s explore the essential tips you need to ensure a safe and effective tick removal process.
Key Takeaways
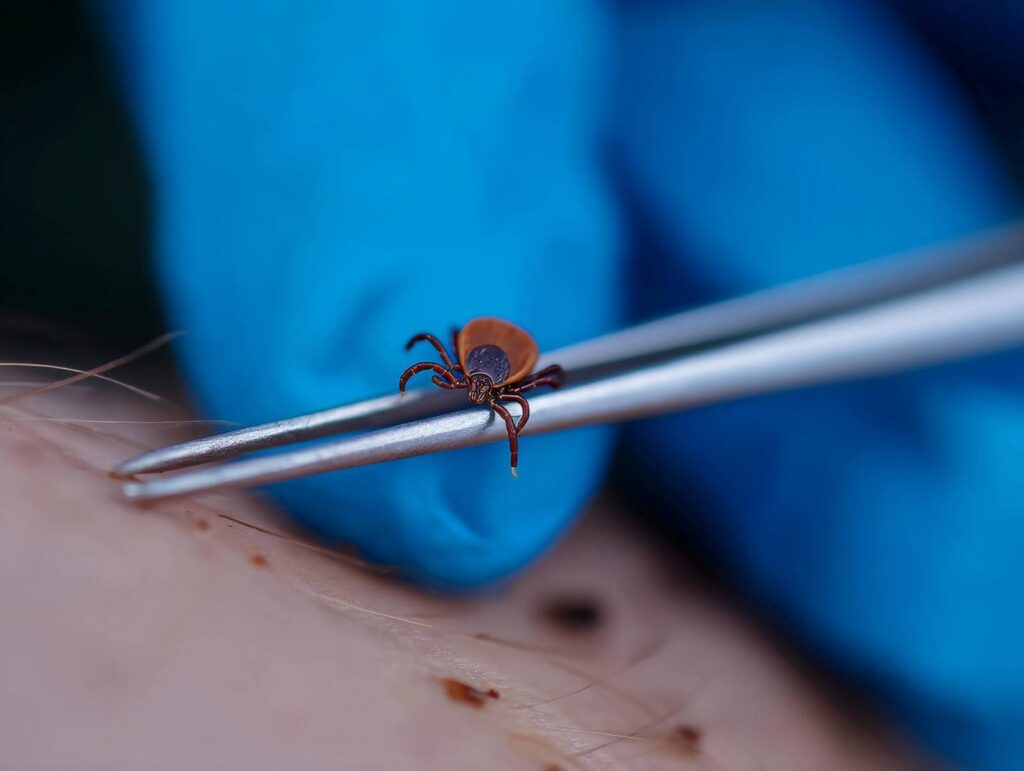
- Use fine-tipped tweezers to grasp the tick as close to the skin as possible for safe removal.
- Pull upward with steady, even pressure without twisting or jerking the tick out.
- Clean the bite area and your hands with rubbing alcohol or soap and water after removal.
- Store the tick in a sealed container to confirm its identification if necessary.
- Monitor for symptoms like rash or fever, and seek medical attention if needed.
Understand the Risks of Tick Bites
Although ticks are often small and easy to overlook, their bites can pose serious health risks. They can transmit various tick-borne diseases, such as Lyme disease and Rocky Mountain spotted fever.
If you’re spending time outdoors, it’s vital to understand these risks and employ effective prevention strategies. Wear long sleeves, use insect repellent, and avoid tall grasses and dense brush where ticks thrive.
Checking yourself and your pets for ticks after outdoor activities can help catch any potential issues early. Being aware of the symptoms of tick-borne diseases, like fever and rash, is also essential.
Gather the Right Tools for Removal
When it comes to tick removal, having the right tools is essential for a safe and effective process.
Start by gathering a pair of fine-tipped tweezers, which are ideal for grabbing the tick as close to the skin’s surface as possible. You might also want a small container with a lid to safely store the tick after removal.
Consider using gloves to prevent direct contact, and have antiseptic wipes on hand for cleaning the bite area afterward.
Some people find tick removal tools specifically designed for safe extraction methods beneficial, so check your local pharmacy or outdoor supply store.
With the right tick removal tools, you’ll feel more confident and prepared for a successful removal.
Locate the Tick and Assess Its Attachment
Locating the tick on your skin is essential for effective removal. Start by conducting a thorough tick identification check.
Look for small, dark spots, usually the size of a pinhead, often found in warm, hidden areas like behind the ears, underarms, or the scalp.
Once you find the tick, perform an attachment assessment. Determine how deeply it’s embedded in your skin.
If it’s just resting on the surface, it’s easier to remove. However, if the head is buried, it requires careful extraction.
Remember, the longer a tick remains attached, the higher the risk of disease transmission.
Stay calm, and ensure you have the right tools ready for the next steps in the removal process. Your safety matters!
Use Proper Technique for Removal
When removing a tick, it’s essential to gather the right tools, like fine-tipped tweezers and antiseptic.
Follow a step-by-step process to ensure you remove the tick safely and completely.
This approach minimizes the risk of infection and disease transmission.
Gather Necessary Tools
To effectively remove a tick, you’ll need a few essential tools at your disposal. Start with fine-tipped tweezers, as they allow you to grasp the tick close to the skin without squeezing its body.
You should also have rubbing alcohol for disinfecting the area before and after removal. A small container with a lid is useful for storing the tick, in case you need to identify it later.
If you’re in tick habitats, it’s wise to carry these tools during outdoor activities, as understanding tick behavior can help you prevent bites.
Follow Step-by-Step Process
Once you’ve gathered your tools, it’s essential to follow a step-by-step process for effective tick removal.
Start by confirming you’ve correctly identified the tick; knowing its species helps determine any potential risk. Next, use fine-tipped tweezers to grasp the tick as close to your skin’s surface as possible. Pull upward with steady, even pressure—don’t twist or jerk, as this can leave mouthparts behind.
Once removed, clean the bite area and your hands with rubbing alcohol or soap and water. Dispose of the tick in a sealed bag.
Be wary of removal myths like using petroleum jelly or heat; these can be harmful. Following these steps will ensure a safe and effective tick removal experience.
Avoid Common Mistakes During Removal
When removing a tick, using the right tools is essential to avoid complications.
You need to be careful not to crush the tick, as this can release harmful fluids.
After removal, make sure to clean the bite area thoroughly to reduce the risk of infection.
Use Proper Tools
Using the right tools for tick removal is essential for effective and safe extraction. Invest in specific tick removal tools, such as fine-tipped tweezers or specialized tick removers. These tools help grasp the tick as close to your skin’s surface as possible, ensuring a clean pull.
Avoid using common household items like matches or petroleum jelly, as they can cause the tick to release harmful fluids. Familiarize yourself with safe extraction techniques to minimize risks.
Always remember to clean the area afterward and monitor for any signs of infection. By using proper tools and techniques, you’ll protect yourself and foster a sense of community responsibility in keeping everyone safe from tick-borne illnesses.
Don’t Crush Tick
While it might be tempting to crush a tick during removal, doing so can be a significant mistake. Understanding tick anatomy and behavior is essential for safe removal.
When you crush a tick, you risk releasing harmful pathogens into your skin. Ticks are adept at holding on tightly, and pressure can cause their mouthparts to break off, leading to infection.
Instead of squishing, focus on pulling the tick out gently and steadily with proper tools. This approach minimizes the chances of leaving any parts behind and reduces the risk of infection.
Clean Bite Area
After successfully removing the tick without crushing it, the next step is to clean the bite area thoroughly. Use soap and water or an antiseptic wipe to ensure you eliminate any bacteria. This is essential for proper bite care.
Avoid using alcohol or hydrogen peroxide, as these can irritate the skin. After cleaning, keep an eye on the area for any infection signs like redness, swelling, or pus. If you notice any unusual symptoms, consult a healthcare professional immediately.
Clean the Bite Area Thoroughly
To ensure proper healing and reduce the risk of infection, it’s important to clean the bite area thoroughly right after removing the tick.
Start by washing your hands with soap and water to make sure they’re clean before touching the wound.
Use mild soap and warm water to gently cleanse the bite area.
After that, apply an antiseptic solution, such as hydrogen peroxide or an alcohol wipe, to disinfect the wound. This antiseptic application helps prevent bacteria from entering.
Finally, cover the area with a sterile bandage to protect it during the healing process.
Proper wound care is vital; keep an eye on the site for any signs of infection, and don’t hesitate to seek medical advice if you notice anything unusual.
Monitor for Symptoms After Removal
Once you’ve removed the tick, it’s essential to monitor for any symptoms that could indicate an infection or tick-borne disease.
Effective symptom tracking during the days following removal can help ensure your health. Keep an eye out for:
- Rash or redness around the bite area that expands or worsens
- Fever or chills that develop unexpectedly
- Fatigue or muscle aches that persist beyond normal activity levels
These symptoms may require follow-up care, so don’t hesitate to document any changes.
Regularly check the area and your overall health, and reach out to a healthcare provider if anything seems off. Staying vigilant helps you feel connected and proactive about your well-being.
Know When to Seek Medical Attention
Monitoring your health after tick removal can help you catch any concerning symptoms early. If you notice any tick bite symptoms, such as redness, swelling, or a rash around the bite area, it’s essential to stay vigilant.
Additionally, be aware of potential Lyme disease signs, which may include fever, chills, fatigue, or joint pain. If you experience any of these symptoms within a few weeks after removal, don’t hesitate to seek medical attention. Early diagnosis and treatment are key to preventing complications.
Prevent Future Tick Bites
Preventing future tick bites is essential, especially if you’ve had an unpleasant experience with ticks before.
To keep yourself safe, implement these preventive measures:
Wear protective clothing: Choose long sleeves and pants, ideally light-colored, to easily spot ticks.
Use insect repellent: Apply a repellent containing DEET or picaridin on exposed skin and clothing.
Create a tick-safe zone: Maintain your yard by mowing the lawn regularly, clearing tall grasses, and removing leaf litter.
Frequently Asked Questions
Can Ticks Transmit Diseases Immediately After Attachment?
Ticks typically need to be attached for several hours before disease transmission occurs. If you find a tick on you, it’s essential to remove it promptly to reduce the risk of infection and keep yourself safe.
How Can I Tell if a Tick Is Engorged?
You can tell if a tick is engorged by checking its size and color. An engorged tick appears swollen, often darker, indicating it’s fed. Understanding tick identification and their lifecycle helps you recognize these vital signs.
What Should I Do With the Tick After Removal?
After removal, dispose of the tick using proper tick disposal methods, like sealing it in a bag. Consider sending it to tick testing services for analysis to check for diseases, ensuring your peace of mind.
Can I Use Essential Oils to Repel Ticks?
Yes, you can use essential oils as natural repellents to deter ticks. Oils like lavender and eucalyptus offer essential oil benefits, creating a protective barrier. Just remember to apply them regularly for maximum effectiveness.
Are Certain Ticks More Dangerous Than Others?
Yes, certain tick species are more dangerous than others. Proper tick identification is essential, as some carry serious diseases like Lyme disease or Rocky Mountain spotted fever. Familiarize yourself with local tick species to stay safe.
Recap
By following these essential tips for safe tick removal, you can effectively reduce the risks associated with tick bites. Remember to gather the right tools, use proper techniques, and monitor for any symptoms after removal. Staying vigilant and proactive helps protect your health. Visualize this process as a step-by-step guide: assess, remove, clean, and monitor. With these practices, you’re not just removing a tick; you’re taking control of your well-being and preventing future bites.
Recent Posts
Comparing Termite Treatment Costs: A How-To Guide
When you’re faced with a termite infestation, understanding treatment costs is vital for effective management.
Understanding Exterminator Costs for Mosquito Control
Imagine you own a large backyard and decide to hire a mosquito exterminator. You might
What Are Average Exterminator Costs for Mosquito Control?
When it comes to mosquito control, understanding average exterminator costs is essential for effective management.